

My ultimate dream home would be one in which all the meals and all the ingredients for the meals would be homemade or homegrown. Obviously this wouldn't just happen overnight, but it excites me when we make one small step towards that end.
One of those steps for me is when I find a good recipe for a certain food that we'd normally buy from the store, and then replace the store-bought product for the homemade. Probably the most beneficial and thrilling achievement I've made in this area is making homemade bread versus buying it from the store every week. Not that bread is the most expensive grocery item that we buy, but at our house, a loaf of bread sure goes fast...that and milk. So now all we need is a cow. =) But anyway, making bread is really quite fun once you get the hang of it. For me, it's just become part of the weekly routine. We have a family of six, so two homemade loaves usually last us two days. So I'm now baking bread every other day, which isn't entirely necessary I suppose, assuming I could make more in one day and then freeze some. But I've really come to enjoy baking bread. Like I said, it's just become a part of the routine, and routine makes me happy. Not only that, but when I make bread more often, we have fresher bread more often as well. And that, I believe, makes everyone happy. =)
So, let's get down to business, shall we?
Homemade White Bread (from the kitchn)
1 c. water, lukewarm
2 tsp. yeast, active-dry
2 Tbsp. butter, unsalted
1 c. milk
2 Tbsp. sugar
1 Tbsp. salt
5 1/2 c. flour
1. Pour the water in a mixing bowl and sprinkle yeast over the top to dissolve.

The water shouldn't be dish-water hot or it'll kill the yeast. But it shouldn't be too cool either. Shoot for lukewarm water. Once you make this several times, you'll eventually get a feel for the right temperature.
In order to proof the yeast (make sure that it's living), I usually sprinkle about 1/2 Tbsp. of the sugar over top as well. You can mix the yeast and sugar into the water if you want, but usually I get yeast stuck on the spoon this way, so I prefer to just let it sink to the bottom. The yeast will then feed on the sugar, causing it to foam up. Oh and, make sure you watch it foam... it's really awesome! I've been making bread for almost a year now and I still like watching the yeast gradually sprout up to the top.
2. As the yeast is dissolving, melt the butter in a small bowl. Add heated milk, sugar, and salt; stir. Then pour the milk and butter mixture into the yeast water.

Make sure that you make a mental note to heat the milk in the microwave. If you don't, you'll end up with a messy counter top and a broken bowl (like I unfortunately had, one baking day)! Hot, melted butter and icy cold milk do not mix!
3. Now add one cup of flour and stir.

It will be lumpy like this, but no worries.
4. Keep adding flour and stirring until dough forms into a ball. Then dump it onto a floury surface.

If you're like me and try to scrape every last scrap of dough off the bowl and spoon, you'll spend more time making bread than you really want to. Try to ignore the inclination, get most of the dough out, and then move on. Nitpickiness won't serve you well here, especially if you plan to make bread weekly.
At this point, I usually let the bowl soak in water since I'll need it to be clean for later, after I'm done kneading. That way the dough doesn't harden on the bowl and so it's easier to wash.
5. Knead dough for 8-10 minutes, adding flour as needed.


Once again, this is something that you'll just get the feel for eventually. At first, the dough will stick to your hands, but it's perfectly fine. You can add good amounts of flour until it's less sticky. Nonetheless, after you've been kneading for a while, be cautious of adding too much flour. If it's still sticking to your hands, just add small amounts at a time (I just grab a little flour with the tips of my fingers).
As for kneading, the pictures above should hopefully help illustrate how it's done. Basically, it's a 3 step process. First, stretch the dough out with one hand. Make sure you are actually stretching the dough, not just flattening it. Remember, what you're actually doing here is trying to stretch the yeast strands so they're good and strong. Secondly, fold the dough in half. And thirdly, turn the dough so that the fold is facing right or left. Then, repeat the steps until you've got a nice, strong mound of dough.
Kneading is just about the best part of making bread, and is one of the reasons I don't use a bread-machine. There's something about kneading that I find appealing. Maybe it's the steady rhythm or the feeling of the dough against my hands, or maybe it's the process of stretching the yeast until it's good and strong. At any rate, it might get tiring or even frustrating at first. But there comes a point where you know how much flour to add or when you know you've kneaded it enough. When the dough is ready to rise, it'll be elastic and will sit in a tight ball without drooping. Or, you can use my favorite method, the window pane test. Simply pinch off a golf-size piece of dough, roll it into a ball, and then slowly stretch it with the tips of your fingers and hold it up to the window. If the dough doesn't tear and if it's transparent enough so the light shines through it, then your ready for the next step!

6. Place the dough in a clean bowl (the one you've soaked in water, if you wish) and cover with either plastic wrap or a damp kitchen towel.

In the cold, winter months, fresh-out-of-the-oven bread is amazing! But trying to find a warm environment for your dough to rise can be challenging. I've used several different methods but I've found this one to work the best. Place the covered-dough on a baking tray and then fill the tray with the hottest water you can get from your kitchen faucet. Place it in the oven and then lay a towel over the bowl and the tray so that the heat from the water is contained. Close the oven door and wait for the dough to rise!

7. Once the dough has doubled in size, punch it down and separate the dough into 2 parts. Then place them on the counter to rest for 10 minutes. Meanwhile, grease 2 bread pans (shortening and a dusting of flour works best). Form each ball into a loaf (here's a helpful video on how to form a sandwich loaf), place them in the pans, cover, and let them rise a second time (you can use the same rising method).

8. Once the dough has risen over the top of the pans, preheat the oven to 425 degrees. As soon as the dough is in the oven, reduce the temperature to 375 degrees and bake the bread for 30-35 minutes. Bread will generally be darker on the top than on the sides when done.

Open the oven to find two golden-brown loaves of pure goodness!
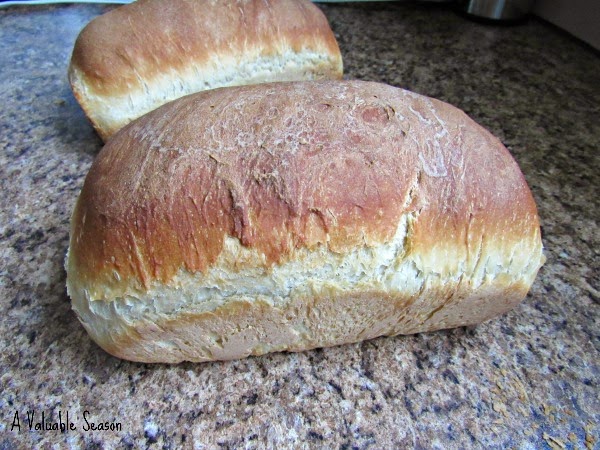
I know it's tempting to dive right in, but cutting the loaves before they've cooled prevents the crust from softening. You'll notice that the crust is really hard when you first take them from the oven, but once they've cooled, the crust gets nice and soft. I'm not a fan of tough crust, so I normally like to let them cool first. Nonetheless, fresh warm bread is awfully hard to resist, so we sometimes wait at least 10 minutes and then treat ourselves to a hot loaf.
When I first started making bread, the best advice I found was to choose a recipe and stay with it. If it didn't turn out the first time, don't keep trying new recipes until you get it right. But rather choose one recipe and try, try again until you've mastered it. I've been using this recipe ever since I started making bread last spring and it turns out better and better the more I practice and take note of what I did differently. I like this recipe, particularly because the measurements are so easy to remember. So after a while, I didn't need to keep referring back to the recipe. If you can then, it's very helpful to try to memorize the measurements.
I hope you found this helpful and that you'll come back for some more delicious homemade bread recipes. Wish you the best in your bread-making adventures! Happy baking!

Thank you for this recipe! I've been apprehensive about baking my own bread but this looks yummy and I think I will give it a try!
ReplyDeleteSo glad you decided to give it a shot...it's absolutely worth it! I'd love to hear how it when and answer any questions you might have! =)
Delete