.post-body img { margin-left: -40px;}

Saturday, March 28, 2015

Button Tree


  At last I'm writing a new post! You all probably thought you weren't going to hear from us again. :) Well things have been pretty busy around here, with working, horse sitting, getting over colds, and working on new projects. But now I've finally completed a craft this week that I've been wanting to make for a while. A button tree!

 When I first saw this idea on Pinterest, I was on a button craze. I looked up different kinds of button crafts( I'm sure you saw my button bracelet) but this one really stuck in my mind. I thought to myself, "If I felt like doing a big project that would take a while I would do that right there."
And not long after that my mom started looking for a big picture to hang on the empty wall behind our couch, and I proposed this option.

 So here is how I made this adorable button tree canvas.

First off, you will need:
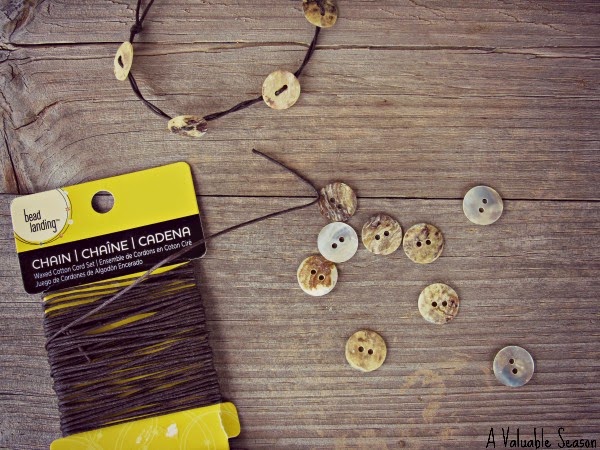
. A canvas
. Acrylic paint for your background and for the tree
. Buttons in various colors and shapes(I used pretty much all green except for a little bit of light brown, or you could go with multiple colors. Your choice.)
. Pencil and paintbrushes
. Tacky glue

So to get started you need to paint your entire canvas. The example I got from Pinterest(see here)actually used spray paint in different colors. Whatever works for you. I used acrylic paint in a khaki color to go with the country, folk art theme of our living room.

Then, very lightly, draw your tree with a pencil. Going with my particular theme, I chose to do a willow tree.

Once your happy with your drawing, go ahead and paint it, giving it an extra coat if necessary to make it dark and the brush strokes less noticeable.


Then it's time for the buttons! When the tree is completely dry, put all the buttons in place, making sure everything is the way you want it. And when you're satisfied, glue all the buttons in place. This is the longest most tedious part of the project, but hang in there, cause when it's done it will be beautiful!


And when the glue has had enough time to dry completely, your button tree will be ready for duty as a beautiful decoration in your house! I hope you enjoy this project as much as I did, and thanks for reading. :)


Thursday, March 12, 2015

Button Bracelet


 Even though, on the one hand, I like delicate and fine chain jewelry, I also like the more rustic, country style. And compared to that last bracelet I made, this one is definitely "rustic".


 I got a basic inspiration for this bracelet just by browsing online. I had seen several similar bracelets with some kind of, perhaps, leather cording, with buttons attached, but I didn't go off of any particular idea for this. I just decided it was about time to make a button bracelet, and sat down to figure out a way to do it.

 A few notes about making this bracelet:

. It was SO easy! Once I had the plan figured out it was a piece of cake. Anyone can make this! :)

. Very easy to put on with one hand(always a plus).

. You know how, with bracelets, the clasp end(the one you usually want to be on the bottom)is always twisting around to the top? Well with this bracelet it doesn't matter. The clasp is only a loop and a button, so it really isn't that noticeable anyway.


Okay, so to make this bracelet yourself, you just need some buttons, and some kind of cording. I used a thin, waxed cotton cord, which is very bendable and small enough to fit through those little button holes.


  After you cut your cord, bend it in the center to make a loop. Make it big enough for your button to fit through easily, then tie a knot to secure it.


 You will then have two separate cords branching out from the knot. Loop the buttons on the individual strands, spaced out how you like them, and alternate between the two strands. After doing this, I twisted the strands around each other to make it hold it's shape better and to keep the buttons facing the right way. This just brings the bracelet together well. Then make sure you have the right length to fit your wrist, and tie the last button onto the loose ends. And that's it!


So there's my button bracelet. An easy, simple project, with awesome results. I think it's one of my favorites now! :)


Tuesday, March 10, 2015

Homemade Hamburger Buns


 Lunch meat sandwiches are a staple at the Shingler household. So as you could guess, we buy hamburger buns almost every week. And, as you might also guess, I've been wanting to try my hand at making them. One less item to buy, one more to make.
 At first, I thought it would be time consuming. I won't lie to you. It did take some time. I'm discovering that all things "bready" do take time. Of course, the more effort you put into a food, the better it tastes. Anyway, it didn't actually take as much time as I originally thought. There's basically three main steps:

1) Make the dough, knead it, and let it rise.
2) Shape the dough into 16 round rolls (this is easier than it sounds) and let them rise again.
3) Bake the buns for 15 minutes and enjoy an extra-scrumptious sandwich!

 Once you get past the realization that bread needs to be kneaded and given time to rise, you'll be like me and want to bake every kind of doughy thing that exists!

                    Homemade Hamburger Buns   (adapted from the kitchn)

 Ingredients 

 1 Tbsp. active-dry yeast

 1 c. warm water

 1 c. milk

 2 eggs

 4 Tbsp. vegetable oil

 4 Tbsp. sugar

 2 tsp. salt

 6 c. flour

 2 Tbsp. butter

 Instructions

 1. Dissolve yeast in warm water.

 2. Meanwhile, whisk milk, eggs, oil, sugar, and salt in a separate bowl.

 3. Add to yeast mixture.

 4. Gradually add flour until combined.

 5. Knead dough and let rise.

 6. Divide dough into 16 round rolls and let rise again.

 7. Melt butter and brush on to risen buns.

 8. Bake at 375 degrees for 15-18 minutes or until golden brown.  

 Notes

 I actually used more flour than what the recipe actually called for because it was hard to knead. My buns turned out just fine, so I would say to use the flour you need to get the consistency that seems right to you. Just be hesitant to add way too much. Small amounts at a time are good.

 Believe it or not, I actually forgot to use the butter (silly me). I would suggest using it though, in order to keep the crust soft.

 Also, when it comes to giving these hamburger buns their wonderfully rounded shape, simple technique is the trick. Just take the sectioned-off piece of dough and roll in a tight circle against the counter or table with the palm of your hand. After a few circles, you'll have a perfect little sphere!

  I was so delighted with the outcome of this recipe! Couldn't have been happier. Won't you give it a try?


Tuesday, March 3, 2015

Peach Orange Smoothie


Okay, there's consistent freezing temperatures, snow and ice on the ground, and probably quite a few more weeks of winter left, and I'm inside making smoothies! Maybe it has to do with my impatience for the final arriving of summer and warm weather. Whatever it is, I have a sudden appetite for a tall glass of icy, fruity nourishment (no matter how cold it makes my hands). I love making smoothies because they're so easy to experiment with and they make a really quick and healthy snack. All it takes is some fresh fruit, milk or juice, ice cubes, sweetener (I like to use honey mostly), and maybe some yogurt. Toss it all in a blender and puree until nice and smooth!
 If you're like me and can't wait for warm weather and cool drinks, it's nice to have some frozen peaches left over, so you can make this smoothie before warmer weather. All the rest of the fruits in this smoothie are mainly non-summer fruits (since I made it in the middle of winter). So grab all your yummy ingredients(and a sweater and slippers!), and join me in my chilly kitchen to make an icy-cold, Peach Orange smoothie!

 Peach Orange Smoothie

Ingredients

1 1/4 c. frozen peaches

1 small orange or tangarine

1/4 c. milk

1/4 c. greek yogurt (vanilla or strawberry)

4 ice cubes

1 tsp. honey

Place all ingredients in a blender and pulse until smooth. Enjoy!